WordPress media settings are a one time set up that can make your WordPress website load faster, improve user experience and also give some boost in your SEO results.
But what are WordPress media settings, and how to set up your website properly? Find out in this new article, with an easy-to-uinderstand video below.
What Are WordPress Media Settings?
With media settings you set up the dimensions of the pictures that show up in your blogposts or pages in your WordPress site. It’s important to mention that WordPress media settings do not affect videos.
Setting up properly your WordPress media should improve user experience as well as make your website load faster and also can give you some boost in SEO because the sizes of your pictures are right and they load faster.
I have to warn you though that don’t expect a huge SEO benefit from just tweaking your media settings. Read all my WordPress SEO Tips if you really want to give a boost to your WordPress site in the search engines.
And lastly, you should change your media settings at the very beginning of installing your WordPress website.
Where To Find WordPress Media Settings
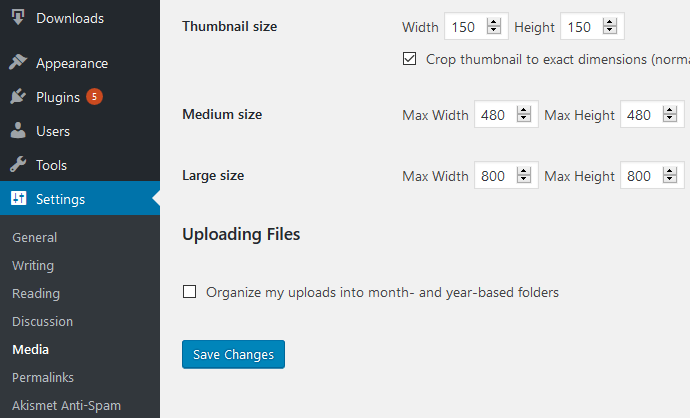
Just go ahead and login to your WordPress dashboard, and select Settings » Media.
Proper Setup
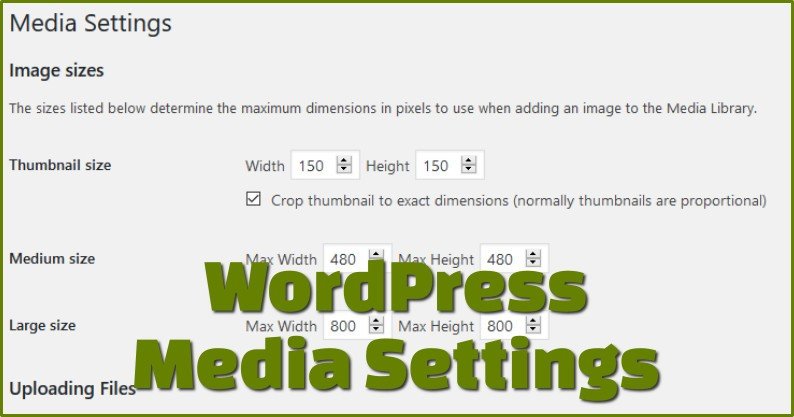
- Thumbnail size. in my opinion, you shouldn’t worry about changing the thumbnail size. This is the size of the thumbnails that you see on your home page or your category pages, but generally all WordPress themes take care of defining their own thumbnail size. So you’re good to leave this as is.
- Medium size: You should set your medium size to about 50% of your theme width. You can check your theme width by right-clicking on your content, then choosing “Inspect” or “Inspect Element” which is available in most browsers. Then check the dimension of your content, what you can find usually on the right-hand side, under the “Computed” tab (see below).
- Large size. Set your large size to the maximum width of your theme, or a little less (80-90%) if you don’t want your large pictures to go all the way through your content horizontally.
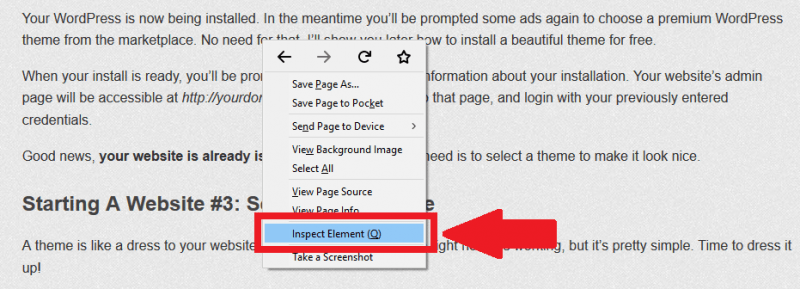
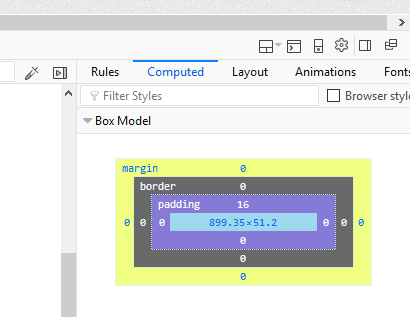
- By applying these settings, when you upload a picture, you have basically two options. Either use the large size and have a large picture that is as big (or almost as big) as the with of your content, or use the medium size and have a smaller picture, half the size of your content.
- Organize my uploads into month- and year-based folders. If you leave this option on, you got longer URL’s (with the year/month of upload time in your URL’s), but will be much easier to organize your pictures based on the upload date or even make a backup as you only have to back up your newly added media folders. In general I think this comes down to how often you upload new media and if the upload date is relevant, e.g. in the case of a news website. I usually like to turn this option off, this way I get nicer URL’s for my pictures and also easier to find my pictures later as they all reside in the same folder. On the other hand, for a news website, where picture publication date could be relevant, I would suggest to turn this option on.

Good news is you only have to make these media settings for your WordPress site once. In case you choose to change your theme, I would go back and check the medium and large sizes for my new theme, as shown before.
If you set up your WordPress media settings correctly, your visitors’ browsers don’t have to resize your pictures, this results in faster load time and better user experience. Also you don’t use unnecessarily big files, again resulting in faster load times, better user experience, and all this guarantees that you did everything as far as media speed settings to boost your website’s SEO results.
WordPress Media Settings Video
In this video I explain how to use your WordPress media settings correctly.

Valuable simple trick